4 point saddle calculator
Enter the obstacle height, its width and the bend angle. You get the mark spacing for each offset, the spacing between the two offsets and the total shrink.
Enter your measurements
Mark spacing (each offset)
8in
Exact geometry
- Centre spacing (between the offsets)
- In the app
- Shrink
- In the app
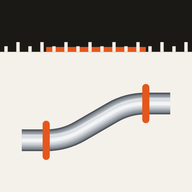
Every result is in Truemark
The free web version shows the main result and the drawing. Truemark gives you every mark and measurement, and exports a cut sheet. It is free to download.
How to lay it out
Measure the obstacle
Measure how high the conduit has to rise to clear the obstacle and how wide the obstacle is along the run.
Lay out the first offset
Make the first mark where the rise has to start. Measure the mark spacing from it for the second mark.
Lay out the second offset
From the second mark, measure the centre spacing for the third mark, then the mark spacing again for the fourth.
Bend up and over
Bend the first offset up over the obstacle, then bend the second offset back down the opposite way, all four bends to the same angle and in one plane.
Allow for the shrink
The run is shorter by the total shrink of both offsets. Allow for it before you cut the pipe to length.
Good to know
- FabLayout runs the same code as Truemark; the result is exact geometry.
- Source: Plane trigonometry; same calculation as the Truemark app
Method and formula
A 4-point saddle is two offsets back to back: one goes up over the obstacle and the other comes back down. Both have the same depth and angle, so the math is the offset done twice, with a straight between them as wide as the obstacle.
- Mark spacing (each offset) = obstacle height ÷ sin θ.
- Centre spacing = obstacle width, the straight piece that runs over the top.
- Shrink = 2 × obstacle height × tan(θ ÷ 2), one shrink for each offset.
Use it for wide obstacles such as ducts, beams or cable tray, where a 3-point saddle would not clear the full width.
Worked example
The page defaults: a 4″ high obstacle, 12″ wide, with 30° bends. Each offset has its marks 4 ÷ sin 30° = 8″ apart. The second and third marks are 12″ apart, the width of the obstacle. The total shrink is 2.1436″.
Questions
When should I use a 4-point saddle instead of a 3-point?
When the obstacle is wide or square, such as a duct or a beam. A 3-point saddle only clears something narrow at its peak; the 4-point saddle has a flat top as wide as the obstacle.
Do both offsets have to use the same angle?
This calculator assumes they do, which keeps the run parallel on both sides of the obstacle. Mixing angles gives a different spacing and shrink for each offset.
Is the shrink for one offset or both?
Both. The figure shown is twice the shrink of a single offset at that height and angle.
Similar calculators
More in TruemarkBack-to-back 90sCorner obstructionKickSee what the app does